Программа adb отобразит список устройств, подключенных в настоящий момент к компьютеру. Ручная установка драйвера ADB Ручная установка adb драйверов wind xp
Практически каждый владелец Android устройства, который решил улучшить своего любимца путем замены прошивки или ядра операционной системы, сталкивается с программой adb.
Для большинства новичков именно эта программа становится непреодолимым препятствием и мы сегодня расскажем вам, как установить и начать работу с этим замечательным приложением, которое поможет вам, например, получить rootправа на вашем устройстве, прошить новую версию Android или даже восстановить ваш телефон или планшет к первоначальному состоянию после неудачного вмешательства в систему.
Так что же такое ADB, полюбившийся всем моддерам и хакерам, где его взять, и зачем он нам нужен?
Что такое ADB.
Аббревиатура ADB расшифровывается как Android Debug Bridge (отладочный мост Андроид). ADB является составной частью Android SDK, который можно скачать отсюда .
Так как операционная система Android является разновидностью Linux, для ее настройки часто возникает необходимость работы через командную строку. Конечно, существуют программы – эмуляторы терминала, которые позволяют выполнять команды прямо на устройстве но, во-первых, на маленьком экране телефона делать это неудобно, а во-вторых, иногда требуется доступ к устройству через компьютер, и в этих и многих других случаях программа adb просто незаменима. Программа adb устанавливает связь между устройством и компьютером и позволяет прямо на компьютере выполнять различные манипуляции с системой Android.
Как установить ADB.
Прежде всего, рекомендуем вам скачать самую последнюю версию Android SDK, на момент написания этого руководства доступна версия r11, на ее примере построено все дальнейшее описание, и в более ранних версиях, местоположение необходимых программ после установки SDK, может отличаться от описанного здесь.
1. Скачиваем Android SDK, его можно найти по ссылке указанной ранее. Имеется несколько разновидностей SDK, для Microsoft Windows, Mac OS и Linux.
Нам потребуется разновидность для Microsoft Windows. И здесь есть два варианта – скачать установщик или zip архив с Android SDK. Установщик нам не нужен, тем более он не позволит установить SDK в Windows 7, и поэтому скачиваем zip архив.
В архиве находится папка android-sdk-windows , которая и содержит сам SDK. Распаковываем ее на компьютер. В нашем примере, мы разместили папку в корне диска С. Если вы сделаете то же самое, путь к SDK будет у нас такой: C:\android-sdk-windows
В более ранних версиях SDK внутри этой папки в папке tools располагалась нужная нам программа adb, но позднее она была перемещена разработчиками в папку platform-tools.
Однако, если вы зайдете в эту папку, вы не найдете внутри нее программу adb, поэтому переходим к следующему этапу установки.
2.
Устанавливаем SDK Platform Tools.
Убеждаемся, что наш компьютер подключен к интернету и запускаем находящуюся в папке android-sdk-windows, программу SDK Manager. После запуска программы появится такое окно:
Нам нужно скачать и установить Android SDK Platform-tools и Android SDK Tools.
С помощью двойного клика по пункту или нажатием на «Accept» и «Reject» отмечаем эти два пункта в списке и снимаем отметку со всех остальных пунктов, как показано на приведенном выше скриншоте. Затем нажимаем «Install» и ждем пока скачаются и установятся нужные нам компоненты.
Теперь мы имеем установленную adb на своем компьютере, но для работы с нашим телефоном или планшетом нужно будет установить их драйвер и для дальнейшего удобства с программой, неплохо было бы прописать путь к ней и другим компонентам в систему Windows.
3. Если мы зайдем в папку C:\android-sdk-windows\platform-tools\ , то теперь сможем там обнаружить программу adb.
После этого, нам нужно отредактировать системную переменную PATH, чтобы каждый раз при запуске программы и вводе команд не набирать путь к программе, который выглядит так:
C:\android-sdk-windows\platform-tools\adb
Если вы ни разу не редактировали системные переменные, создайте точку восстановления системы, чтобы потом можно было вернуть ее в первоначальное состояние.
Если у вас установлена Windows 7, клацаем правой клавишей мыши по ярлыку «Компьютер», выбираем «свойства» и в открывшемся окне выбираем «Дополнительные параметры системы».
Если у вас Windows XP, клацаем правой кнопкой мыши по «Мой компьютер» и затем по «Свойства»
В следующем окне на вкладке «Дополнительно» нажимаем на кнопку «Переменные среды». В списке «Системные переменные» выбираем переменную «path» и нажимаем кнопку «Изменить…»
Откроется окно редактирования переменной, и в пункте «значение переменной» в самый конец строки, после точки с запятой добавляем путь к папке tools и папке platform-tools:
;c:\android-sdk-windows\tools;c:\android-sdk-windows\platform-tools;

(если в конце строки не было точки с запятой, добавьте её – каждый путь в этой строке должен отделяться от другого точкой с запятой)
Если вы установили Android SDK в другую папку, пропишите в конце строки ваш путь к папкам tools и platform-tools.
Установка драйверов устройства.
Некоторые устройства, например телефоны и планшеты компании Samsung имеют собственное программное обеспечение для синхронизации с компьютером, и если оно у вас установлено на компьютере, то драйвер устройства уже установлен у вас в системе.
Но для таких устройств, как Nexus One, которые поставляются без каких либо дополнительных программ и драйверов, для работы с Android SDK, драйверы установить необходимо.
Для этого идем в папку, в которую мы устанавливали SDK и запускаем SDK Manager.

Точно так же, как мы устанавливали Android SDK Platform-tools и Android SDK Tools, находим и выбираем в списке «Google Usb Driver package». Нажимаем «Install» и ждем пока программа скачает драйверы. Драйверы для 32 и 64 разрядной Windows будут скачаны в следующую папку:
C:\1\android-sdk-windows\extras\google\usb_driver
Теперь можно установить драйверы для вашего устройства. Для этого в меню настроек телефона или планшета выбираем пункт «Приложения» (Applications), и в нем включаем «Отладка USB» (USB debugging).
Подключаем наше устройство к компьютеру. Компьютер обнаружит новое оборудование и предложит установить драйверы. Устанавливаем драйверы из папки, куда они были скачаны ранее.
После установки драйверов в диспетчере устройств появится новое устройство «ADB Interface» и мы можем убедиться в этом открыв его, нажав правой клавишей мыши по иконке «Компьютер» -> «Свойства» -> «Диспетчер устройств»
Как запустить ADB
Работать с программой adb лучше всего через командную строку Windows. Для вызова командной строки на компьютере с Windows XP, нажимаем «Пуск» и в поле ввода «Выполнить» набираем cmd и нажимаем «Enter».
На компьютере с Windows 7, нажимаем «Пуск» и в поле ввода «Найти программы и файлы» набираем cmd и нажимаем «Enter».
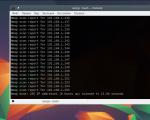
Откроется окно командной строки, и для того чтобы, например посмотреть какие устройства у нас подключены к компьютеру, набираем в нем команду:
adb devicesПрограмма adb отобразит список устройств, подключенных в настоящий момент к компьютеру.

ADB (Android Debug Bridge) — это драйвер для смартфонов и планшетов, который связывает устройство с компьютером и дает возможность управлять его работой посредством командной строки.
Как установить ADB драйвер?
На большинстве устройств с процессором MediaTek ADB драйвера устанавливаются в автоматическом режиме. Для этого качаем архив , распаковываем его на компьютер и запускаем файл Install.bat.
Если после установки драйверов и подключения выключенного смартфона к ПК в Диспетчере устройств рядом с названием горит желтая лампочка, делаем следующее:
- Заходим на компьютер с аккаунта, который владеет правами администратора.
- Нажимаем сочетание клавиш - Windows+R (кнопка Windows находиться между левыми Ctrl и Alt).
- В открывшемся окне пишем mmc devmgmt.msc (или devmgmt.msc ), чтобы вызвать диспетчер устройств.
- На смартфоне в меню «Настройки/Для разработчиков » включаем «Отладку по USB «.
- Вытаскиваем из смартфона аккумулятор, а потом возвращаем его обратно (не включая устройство). Если аккумулятор не снимается просто выключаем смартфон.
- Подключаем смартфон к компьютеру при помощи USB-кабеля.
- Диспетчере устройств . Если появляется устройство с желтым треугольником в разделе ««, то не отключая смартфон устанавливаем на компьютер .
Если устройство появилось в разделе com-портов или в неизвестных устройствах с названием «MT65xx Preloader » либо «MTK usb port » или «DA USB VCOM «, нужно провести ручную установку.
Ручная установка ADB драйверов
Чтобы установить adb драйвера для смартфона в ручном режиме понадобится компьютер, USB кабель и несколько минут времени.
- Качаем и распаковываем на компьютер папку с ADB драйверами .
- Выполняем пункты 1-5 , которые описаны выше.
- Нажимаем правой кнопкой мыши на появившемся новом устройстве в Диспетчере устройств . В появившемся меню выбираем Обновить драйверы.
- Заходим в распакованную ранее папку. В ней переходим в подкаталог Win7 и приступаем к установке. Для 32 -битных операционных систем выбираем файл usb2ser_Win7.inf , для 64 -битных usb2ser_Win764.inf.
- Следуем инструкциям.
- Драйвера установлены!
На Windows8, 8.1 и 10 драйвера ставятся с отключенной проверкой подписи.
Отключение проверки подписи драйверов в Windows
Отключение проверки подписи на Windows 8 :
- Win+I -> Изменение параметров компьютера -> Общие -> Особые варианты загрузки -> Перезагрузить сейчас.
- При выключении нажмите Диагностика -> Дополнительные параметры -> Параметры загрузки -> Перезагрузить.
- После появится меню, в нем выберите «Отключить обязательную проверку подписи драйверов.
Отключение проверки подписи на Windows 8.1:
- Win+I -> Параметры -> Изменение параметров компьютера -> Обновление и восстановление -> Восстановление -> Перезагрузить сейчас.
- При выключении нажмите Диагностика -> Дополнительные параметры -> Параметры загрузки -> Перезагрузить.
- После появится меню, нажимаете F7 и ждете перезагрузку компьютера.
- Далее делается установка драйверов по инструкции.
Отключение проверки подписи на Windows 10:
- Зажимаем клавиши Windows и shift, и удерживаем их.
- Далее Пуск -> Завершение работы -> Перезагрузка
- Отпускаем клавиши Windows и shift, и выбираем пункт «Диагностика»
- На следующей странице выбираем «Дополнительные параметры»
- Далее идём в «Параметры загрузки»
- Просто жмём «Перезагрузить» и ждём, когда система загрузится до следующего шага.
- После перезапуска мы окажемся на странице выбора параметра загрузки системы. Нажимаем клавишу F7.
- Компьютер перезагрузится и отключит проверку подписи драйверов.
- Далее делается установка драйверов по инструкции.
Если вы указываете устройству путь к файлу драйвера, но диспетчер устройств твердит, что с драйверами все отлично и не хочет их обновлять, а устройство появляется в разделе «Android Composite ABD Interface » со значком желтого треугольника, то нужно сделать правку в файле android_winusb.inf, который находится в папке MTK_Android_USB_Driver со скачанного в «Пункте 1 » архива. В нем нам нужно прописать PID\VID , которые ми предварительно узнаем со своего компьютера. Кликаем правой кнопкой мыши на устройстве с желтым треугольником/Cвойства /ID устройства . Там будет 2 строки. Вот эти строки нам нужно скопировать в файл с драйверами . Затем повторно указываем путь к этому драйверу.
android_winusb.inf
— в этом файле делать изменения.
%CompositeAdbInterface% = USB_Install, USB\VID_0BB4&PID_0C01&REV_0255
%SingleAdbInterface% = USB_Install, USB\VID_0BB4&PID_0C01
%CompositeAdbInterface% = USB_Install, USB\VID_0BB4&PID_0C01&REV_0255
VID\PID может меняться, ставимо свои значения.
The Google USB Driver is required for Windows if you want to perform adb debugging with any of the Google Nexus devices. Windows drivers for all other devices are provided by the respective hardware manufacturer, as listed in the OEM USB Drivers document.
Note: If you"re developing on Mac OS X or Linux, then you do not need to install a USB driver. Instead see Using Hardware Devices .
You can download the Google USB Driver for Windows in one of two ways:
Download the Google USB driver
Before downloading, you must agree to the following terms and conditions.
Terms and Conditions
This is the Android Software Development Kit License Agreement1. Introduction
1.1 The Android Software Development Kit (referred to in the License Agreement as the "SDK" and specifically including the Android system files, packaged APIs, and Google APIs add-ons) is licensed to you subject to the terms of the License Agreement. The License Agreement forms a legally binding contract between you and Google in relation to your use of the SDK. 1.2 "Android" means the Android software stack for devices, as made available under the Android Open Source Project, which is located at the following URL: http://source.android.com/, as updated from time to time. 1.3 A "compatible implementation" means any Android device that (i) complies with the Android Compatibility Definition document, which can be found at the Android compatibility website (http://source.android.com/compatibility) and which may be updated from time to time; and (ii) successfully passes the Android Compatibility Test Suite (CTS). 1.4 "Google" means Google LLC, a Delaware corporation with principal place of business at 1600 Amphitheatre Parkway, Mountain View, CA 94043, United States.2. Accepting this License Agreement
2.1 In order to use the SDK, you must first agree to the License Agreement. You may not use the SDK if you do not accept the License Agreement. 2.2 By clicking to accept, you hereby agree to the terms of the License Agreement. 2.3 You may not use the SDK and may not accept the License Agreement if you are a person barred from receiving the SDK under the laws of the United States or other countries, including the country in which you are resident or from which you use the SDK. 2.4 If you are agreeing to be bound by the License Agreement on behalf of your employer or other entity, you represent and warrant that you have full legal authority to bind your employer or such entity to the License Agreement. If you do not have the requisite authority, you may not accept the License Agreement or use the SDK on behalf of your employer or other entity.3. SDK License from Google
3.1 Subject to the terms of the License Agreement, Google grants you a limited, worldwide, royalty-free, non-assignable, non-exclusive, and non-sublicensable license to use the SDK solely to develop applications for compatible implementations of Android. 3.2 You may not use this SDK to develop applications for other platforms (including non-compatible implementations of Android) or to develop another SDK. You are of course free to develop applications for other platforms, including non-compatible implementations of Android, provided that this SDK is not used for that purpose. 3.3 You agree that Google or third parties own all legal right, title and interest in and to the SDK, including any Intellectual Property Rights that subsist in the SDK. "Intellectual Property Rights" means any and all rights under patent law, copyright law, trade secret law, trademark law, and any and all other proprietary rights. Google reserves all rights not expressly granted to you. 3.4 You may not use the SDK for any purpose not expressly permitted by the License Agreement. Except to the extent required by applicable third party licenses, you may not copy (except for backup purposes), modify, adapt, redistribute, decompile, reverse engineer, disassemble, or create derivative works of the SDK or any part of the SDK. 3.5 Use, reproduction and distribution of components of the SDK licensed under an open source software license are governed solely by the terms of that open source software license and not the License Agreement. 3.6 You agree that the form and nature of the SDK that Google provides may change without prior notice to you and that future versions of the SDK may be incompatible with applications developed on previous versions of the SDK. You agree that Google may stop (permanently or temporarily) providing the SDK (or any features within the SDK) to you or to users generally at Google"s sole discretion, without prior notice to you. 3.7 Nothing in the License Agreement gives you a right to use any of Google"s trade names, trademarks, service marks, logos, domain names, or other distinctive brand features. 3.8 You agree that you will not remove, obscure, or alter any proprietary rights notices (including copyright and trademark notices) that may be affixed to or contained within the SDK.4. Use of the SDK by You
4.1 Google agrees that it obtains no right, title or interest from you (or your licensors) under the License Agreement in or to any software applications that you develop using the SDK, including any intellectual property rights that subsist in those applications. 4.2 You agree to use the SDK and write applications only for purposes that are permitted by (a) the License Agreement and (b) any applicable law, regulation or generally accepted practices or guidelines in the relevant jurisdictions (including any laws regarding the export of data or software to and from the United States or other relevant countries). 4.3 You agree that if you use the SDK to develop applications for general public users, you will protect the privacy and legal rights of those users. If the users provide you with user names, passwords, or other login information or personal information, you must make the users aware that the information will be available to your application, and you must provide legally adequate privacy notice and protection for those users. If your application stores personal or sensitive information provided by users, it must do so securely. If the user provides your application with Google Account information, your application may only use that information to access the user"s Google Account when, and for the limited purposes for which, the user has given you permission to do so. 4.4 You agree that you will not engage in any activity with the SDK, including the development or distribution of an application, that interferes with, disrupts, damages, or accesses in an unauthorized manner the servers, networks, or other properties or services of any third party including, but not limited to, Google or any mobile communications carrier. 4.5 You agree that you are solely responsible for (and that Google has no responsibility to you or to any third party for) any data, content, or resources that you create, transmit or display through Android and/or applications for Android, and for the consequences of your actions (including any loss or damage which Google may suffer) by doing so. 4.6 You agree that you are solely responsible for (and that Google has no responsibility to you or to any third party for) any breach of your obligations under the License Agreement, any applicable third party contract or Terms of Service, or any applicable law or regulation, and for the consequences (including any loss or damage which Google or any third party may suffer) of any such breach.5. Your Developer Credentials
5.1 You agree that you are responsible for maintaining the confidentiality of any developer credentials that may be issued to you by Google or which you may choose yourself and that you will be solely responsible for all applications that are developed under your developer credentials.6. Privacy and Information
6.1 In order to continually innovate and improve the SDK, Google may collect certain usage statistics from the software including but not limited to a unique identifier, associated IP address, version number of the software, and information on which tools and/or services in the SDK are being used and how they are being used. Before any of this information is collected, the SDK will notify you and seek your consent. If you withhold consent, the information will not be collected. 6.2 The data collected is examined in the aggregate to improve the SDK and is maintained in accordance with Google"s Privacy Policy.7. Third Party Applications
7.1 If you use the SDK to run applications developed by a third party or that access data, content or resources provided by a third party, you agree that Google is not responsible for those applications, data, content, or resources. You understand that all data, content or resources which you may access through such third party applications are the sole responsibility of the person from which they originated and that Google is not liable for any loss or damage that you may experience as a result of the use or access of any of those third party applications, data, content, or resources. 7.2 You should be aware the data, content, and resources presented to you through such a third party application may be protected by intellectual property rights which are owned by the providers (or by other persons or companies on their behalf). You may not modify, rent, lease, loan, sell, distribute or create derivative works based on these data, content, or resources (either in whole or in part) unless you have been specifically given permission to do so by the relevant owners. 7.3 You acknowledge that your use of such third party applications, data, content, or resources may be subject to separate terms between you and the relevant third party. In that case, the License Agreement does not affect your legal relationship with these third parties.8. Using Android APIs
8.1 Google Data APIs 8.1.1 If you use any API to retrieve data from Google, you acknowledge that the data may be protected by intellectual property rights which are owned by Google or those parties that provide the data (or by other persons or companies on their behalf). Your use of any such API may be subject to additional Terms of Service. You may not modify, rent, lease, loan, sell, distribute or create derivative works based on this data (either in whole or in part) unless allowed by the relevant Terms of Service. 8.1.2 If you use any API to retrieve a user"s data from Google, you acknowledge and agree that you shall retrieve data only with the user"s explicit consent and only when, and for the limited purposes for which, the user has given you permission to do so. If you use the Android Recognition Service API, documented at the following URL: , as updated from time to time, you acknowledge that the use of the API is subject to the Data Processing Addendum for Products where Google is a Data Processor, which is located at the following URL: https://privacy.google.com/businesses/gdprprocessorterms/ , as updated from time to time. By clicking to accept, you hereby agree to the terms of the Data Processing Addendum for Products where Google is a Data Processor.9. Terminating this License Agreement
9.1 The License Agreement will continue to apply until terminated by either you or Google as set out below. 9.2 If you want to terminate the License Agreement, you may do so by ceasing your use of the SDK and any relevant developer credentials. 9.3 Google may at any time, terminate the License Agreement with you if: (A) you have breached any provision of the License Agreement; or (B) Google is required to do so by law; or (C) the partner with whom Google offered certain parts of SDK (such as APIs) to you has terminated its relationship with Google or ceased to offer certain parts of the SDK to you; or (D) Google decides to no longer provide the SDK or certain parts of the SDK to users in the country in which you are resident or from which you use the service, or the provision of the SDK or certain SDK services to you by Google is, in Google"s sole discretion, no longer commercially viable. 9.4 When the License Agreement comes to an end, all of the legal rights, obligations and liabilities that you and Google have benefited from, been subject to (or which have accrued over time whilst the License Agreement has been in force) or which are expressed to continue indefinitely, shall be unaffected by this cessation, and the provisions of paragraph 14.7 shall continue to apply to such rights, obligations and liabilities indefinitely.10. DISCLAIMER OF WARRANTIES
10.1 YOU EXPRESSLY UNDERSTAND AND AGREE THAT YOUR USE OF THE SDK IS AT YOUR SOLE RISK AND THAT THE SDK IS PROVIDED "AS IS" AND "AS AVAILABLE" WITHOUT WARRANTY OF ANY KIND FROM GOOGLE. 10.2 YOUR USE OF THE SDK AND ANY MATERIAL DOWNLOADED OR OTHERWISE OBTAINED THROUGH THE USE OF THE SDK IS AT YOUR OWN DISCRETION AND RISK AND YOU ARE SOLELY RESPONSIBLE FOR ANY DAMAGE TO YOUR COMPUTER SYSTEM OR OTHER DEVICE OR LOSS OF DATA THAT RESULTS FROM SUCH USE. 10.3 GOOGLE FURTHER EXPRESSLY DISCLAIMS ALL WARRANTIES AND CONDITIONS OF ANY KIND, WHETHER EXPRESS OR IMPLIED, INCLUDING, BUT NOT LIMITED TO THE IMPLIED WARRANTIES AND CONDITIONS OF MERCHANTABILITY, FITNESS FOR A PARTICULAR PURPOSE AND NON-INFRINGEMENT.11. LIMITATION OF LIABILITY
11.1 YOU EXPRESSLY UNDERSTAND AND AGREE THAT GOOGLE, ITS SUBSIDIARIES AND AFFILIATES, AND ITS LICENSORS SHALL NOT BE LIABLE TO YOU UNDER ANY THEORY OF LIABILITY FOR ANY DIRECT, INDIRECT, INCIDENTAL, SPECIAL, CONSEQUENTIAL OR EXEMPLARY DAMAGES THAT MAY BE INCURRED BY YOU, INCLUDING ANY LOSS OF DATA, WHETHER OR NOT GOOGLE OR ITS REPRESENTATIVES HAVE BEEN ADVISED OF OR SHOULD HAVE BEEN AWARE OF THE POSSIBILITY OF ANY SUCH LOSSES ARISING.12. Indemnification
12.1 To the maximum extent permitted by law, you agree to defend, indemnify and hold harmless Google, its affiliates and their respective directors, officers, employees and agents from and against any and all claims, actions, suits or proceedings, as well as any and all losses, liabilities, damages, costs and expenses (including reasonable attorneys fees) arising out of or accruing from (a) your use of the SDK, (b) any application you develop on the SDK that infringes any copyright, trademark, trade secret, trade dress, patent or other intellectual property right of any person or defames any person or violates their rights of publicity or privacy, and (c) any non-compliance by you with the License Agreement.13. Changes to the License Agreement
13.1 Google may make changes to the License Agreement as it distributes new versions of the SDK. When these changes are made, Google will make a new version of the License Agreement available on the website where the SDK is made available.14. General Legal Terms
14.1 The License Agreement constitutes the whole legal agreement between you and Google and governs your use of the SDK (excluding any services which Google may provide to you under a separate written agreement), and completely replaces any prior agreements between you and Google in relation to the SDK. 14.2 You agree that if Google does not exercise or enforce any legal right or remedy which is contained in the License Agreement (or which Google has the benefit of under any applicable law), this will not be taken to be a formal waiver of Google"s rights and that those rights or remedies will still be available to Google. 14.3 If any court of law, having the jurisdiction to decide on this matter, rules that any provision of the License Agreement is invalid, then that provision will be removed from the License Agreement without affecting the rest of the License Agreement. The remaining provisions of the License Agreement will continue to be valid and enforceable. 14.4 You acknowledge and agree that each member of the group of companies of which Google is the parent shall be third party beneficiaries to the License Agreement and that such other companies shall be entitled to directly enforce, and rely upon, any provision of the License Agreement that confers a benefit on (or rights in favor of) them. Other than this, no other person or company shall be third party beneficiaries to the License Agreement. 14.5 EXPORT RESTRICTIONS. THE SDK IS SUBJECT TO UNITED STATES EXPORT LAWS AND REGULATIONS. YOU MUST COMPLY WITH ALL DOMESTIC AND INTERNATIONAL EXPORT LAWS AND REGULATIONS THAT APPLY TO THE SDK. THESE LAWS INCLUDE RESTRICTIONS ON DESTINATIONS, END USERS AND END USE. 14.6 The rights granted in the License Agreement may not be assigned or transferred by either you or Google without the prior written approval of the other party. Neither you nor Google shall be permitted to delegate their responsibilities or obligations under the License Agreement without the prior written approval of the other party. 14.7 The License Agreement, and your relationship with Google under the License Agreement, shall be governed by the laws of the State of California without regard to its conflict of laws provisions. You and Google agree to submit to the exclusive jurisdiction of the courts located within the county of Santa Clara, California to resolve any legal matter arising from the License Agreement. Notwithstanding this, you agree that Google shall still be allowed to apply for injunctive remedies (or an equivalent type of urgent legal relief) in any jurisdiction. January 16, 2019ADB, или Android Debug Bridge – это консольное приложение для ПК, с помощью которого можно управлять устройством на базе Android прямо с компьютера. Выглядит это так: сначала на компьютер устанавливаются инструментарий ADB и драйвера для Android, потом мобильное устройство подключается к ПК через USB-кабель в режиме отладки, и, наконец, после запуска ADB в консоли (командной строке) выполняются специальные команды, инициирующие те или действия с гаджетом. Подробная информация о принципе работы самого средства отладки представлена на официальном сайте разработчика, поэтому мы останавливаться на этом не будем, а сразу перейдем к возможностям ADB и способам его установки на компьютер.
Что позволяет делать ADB?
Для начала укажем зачем вообще нужен ADB. С его помощью можно:
- Перезагружать устройство в различных режимах;
- Обмениваться файлами/папками с телефоном;
- Устанавливать/удалять приложения;
- Устанавливать кастомные прошивки (в том числе, TWRP Recovery);
- Производить ;
- Выполнять разного рода скрипты.
Инструмент ADB обычно устанавливается в связке с консольным приложением Fastboot.
Установка ADB и Fastboot из пакета Android SDK
Этот способ предусматривает использование официального средства разработки и тестирования приложений Android Studio. Переходим на страницу https://developer.android.com/studio/index.html и находим заголовок «Get just the command line tools». Ниже скачиваем архив SDK tools для Windows (перед загрузкой соглашаемся с условиями использования).

Распаковываем архив на диск С. В нашем случае файлы были извлечены в папку sdk-tools-windows-3859397 .

Заходим в директорию, а потом переходим в каталог tools/bin . Здесь нас интересует файл sdkmanager , который и поможет установить ADB и Fastboot на компьютер.


Теперь необходимо открыть папку с sdkmanager, для чего в консоли следует выполнить команду cd C:\sdk-tools-windows-3859397\tools\bin , где C:\sdk-tools-windows-3859397\tools\bin – путь к файлу sdkmanager.

Если вы распаковали Android SDK не на диск С, а в какое-то иное место, то полный адрес можно будет узнать с помощью верхней строки Проводника (кликаем по конечной папке правой кнопкой мыши и жмем «Копировать адрес»).

Итак, мы перешли в tools\bin и теперь нам нужно выполнить команду sdkmanager «platform-tools» , которая установит пакет Platform-tools, содержащий файлы ADB и Fastboot.

В ходе установки ознакомьтесь с лицензионным соглашением и нажмите Y для завершения операции.

Если все прошло как надо, в корневой папке Android SDK появится каталог platform-tools с необходимыми файлами adb.exe и fastboot.exe .


Minimal ADB and Fastboot
Второй способ еще более простой. На форуме разработчиков Xda Developers можно скачать пакет Minimal ADB and Fastboot со всеми необходимыми файлами. Для этого заходим на страницу https://forum.xda-developers.com/showthread.php?t=2317790 и, кликнув по ссылке, загружаем установочный exe-файл.

Запускаем его и следуем инструкциям.

Мы установили Minimal ADB and Fastboot в корень того же диска С.

В принципе, на этом все. Осталось проверить наличие файлов.

Проверка работы ADB и Fastboot
После установки приложений любым из приведенных способов необходимо удостовериться в корректности работы утилит. Для этого через командную строку заходим в папку с файлами adb и fastboot (команда cd C:\sdk-tools-windows-3859397\platform-tools или cd C:\Minimal ADB and Fastboot ), а затем выполняем команду adb help . Она должна вывести версию установленного Android Debug Bridge и список команд ADB. Если вы видите примерно то же, что изображено на приведенном ниже скриншоте, значит все работает правильно.

Теперь следует подключить к ПК мобильное устройство и проверить, увидит ли его приложение ADB. Подсоединяем телефон (или планшет) к компьютеру с помощью USB-кабеля, выставляем в настройках режим подключения MTP (обмен файлами) и заходим в раздел Настройки – Для разработчиков .


Если такого пункта в настройках нет, то переходим на страницу «О телефоне» и семь раз кликаем по строке с номером сборки.

Режим разработчика будет активирован, и раздел «Для разработчиков» станет доступным. Заходим в него и включаем опцию «Отладка по USB».

После всех этих манипуляций с гаджетом в командной строке Windows вводим команду adb devices . Она выведет информацию о подключенном устройстве примерно в таком формате, как на скриншоте.

Таким образом, мы протестировали ADB и Fastboot и убедились, что Android Debug Bridge нормально функционирует, а, значит, теперь можно управлять телефоном через компьютер.
Если связь с устройством наладить не получается, то необходимо проверить наличие и корректность установки драйверов Андроид. Для этого при включенном режиме отладки заходим в «Диспетчер устройств» и смотрим, нет ли восклицательных знаков в ветке «Устройства USB» пункт «ADB Interface» (может называться немного по-другому).

При обнаружении неполадок пробуем переустановить драйвера. Скачать их можно на сайте производителя телефона или по адресу https://adb.clockworkmod.com/ .
Надеемся, что статья была для вас полезна.
Прошла презентация процессорного вентилятора be quiet! Shadow Rock TF 2, который использует производительное оформление TopFlow. Его система включает медную основу, пять 6-миллиметровых медных тепловых трубок, алюминиевый радиатор, укомплектованный из 61 пластин, и 135-миллиметровый осевой кулер, зафиксированный сверху устройства. Он распределяет воздушный поток через ребра радиатора на основу, гарантируя дополнительный обдув как процессорного порта, так и размещенных вокруг него узлов (модулей памяти, компонентов подсистемы питания, портов …
 Анонсированный еще в марте текущего года графический адаптер премиум-класса Colorful iGame Kudan 680 все же поступил в продажу в Китае. Но цены на него не весьма радуют, а некоторых покупателей могут даже напугать. За 2Гб вариант видеокарты придется заплатить не много не мало $893 (5700 юаней), а iGame Kudan 680 (с двойным буфером GDDR5) обойдется покупателю в целых $940 (6000 юаней).
Что касается характеристик данных моделей, то они описываются вкратце. Частотные параметры: младший видеоадаптер с 2 ГБ памяти функционирует на номинальных 1100/6400 МГц, а старший с 4 ГБ памяти …
 Организация Thermaright презентовала относительно доступный процессорный вентилятор Thermaright True Spirit 120 Direct, который можно применять вместе с 160-ваттными процессорами платформ AMD Socket AM4, AM3 (+), FM2 (+), а также Intel Socket LGA1155, LGA1156, LGA1150, LGA1151, LGA2011 (v3), LGA2066.
Новый механизм сделан в обычном Tower-оформлении. В его конструкции находятся четыре 6-миллиметровые никелированные тепловые трубки с прямым контактом к теплораспределительной крышке процессора, алюминиевый радиатор и один 120-миллиметровый кулер. Скорость охладителя пребывает в рамках от 600 до 1300 об/мин, …